From the archive
Let's draw pouty lips
Treat this as one small practice round: build the subject lightly, notice the shapes, then darken only the lines that help the finished sketch.
-
01
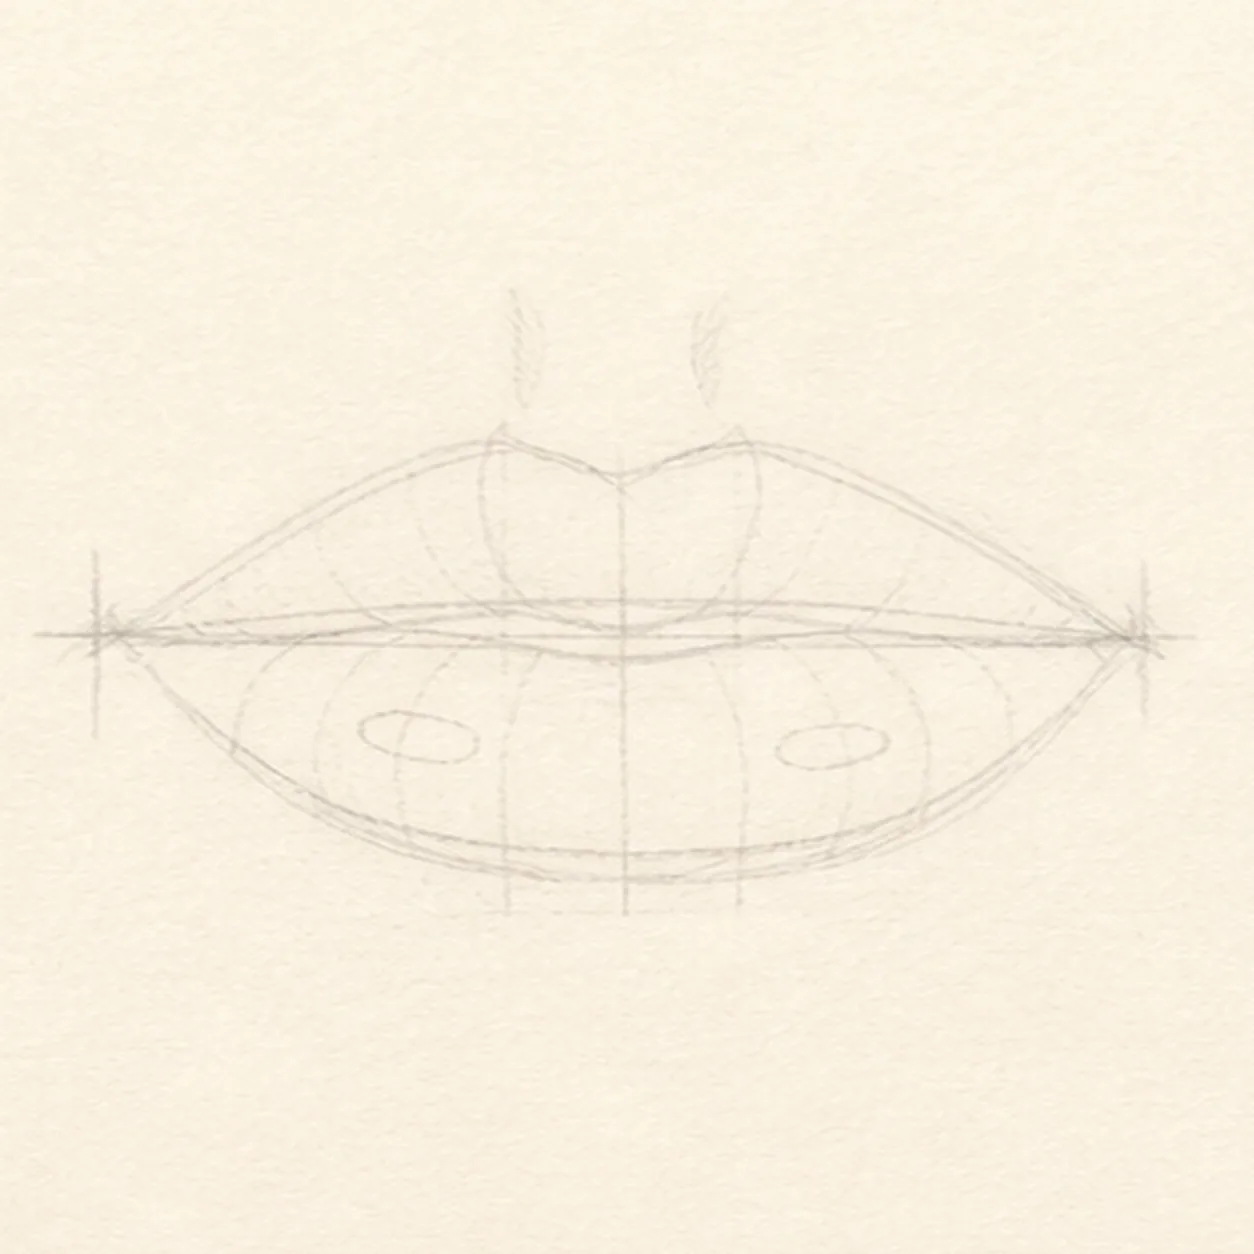
Map the pouty proportions
Use pale graphite to place one horizontal mouth axis, two corners, the upper- and lower-lip envelopes, the cupid's-bow center, one narrow opening route, two oval highlight reserves, one broken center glow, and two light philtrum anchors.
Sketch tip: Ghost the mouth width and lower-lip arc before touching down, then compare the empty paper above and below the axis. Reserve the opening and highlights now so later graphite can stop around them instead of becoming marks you must erase.
-
02
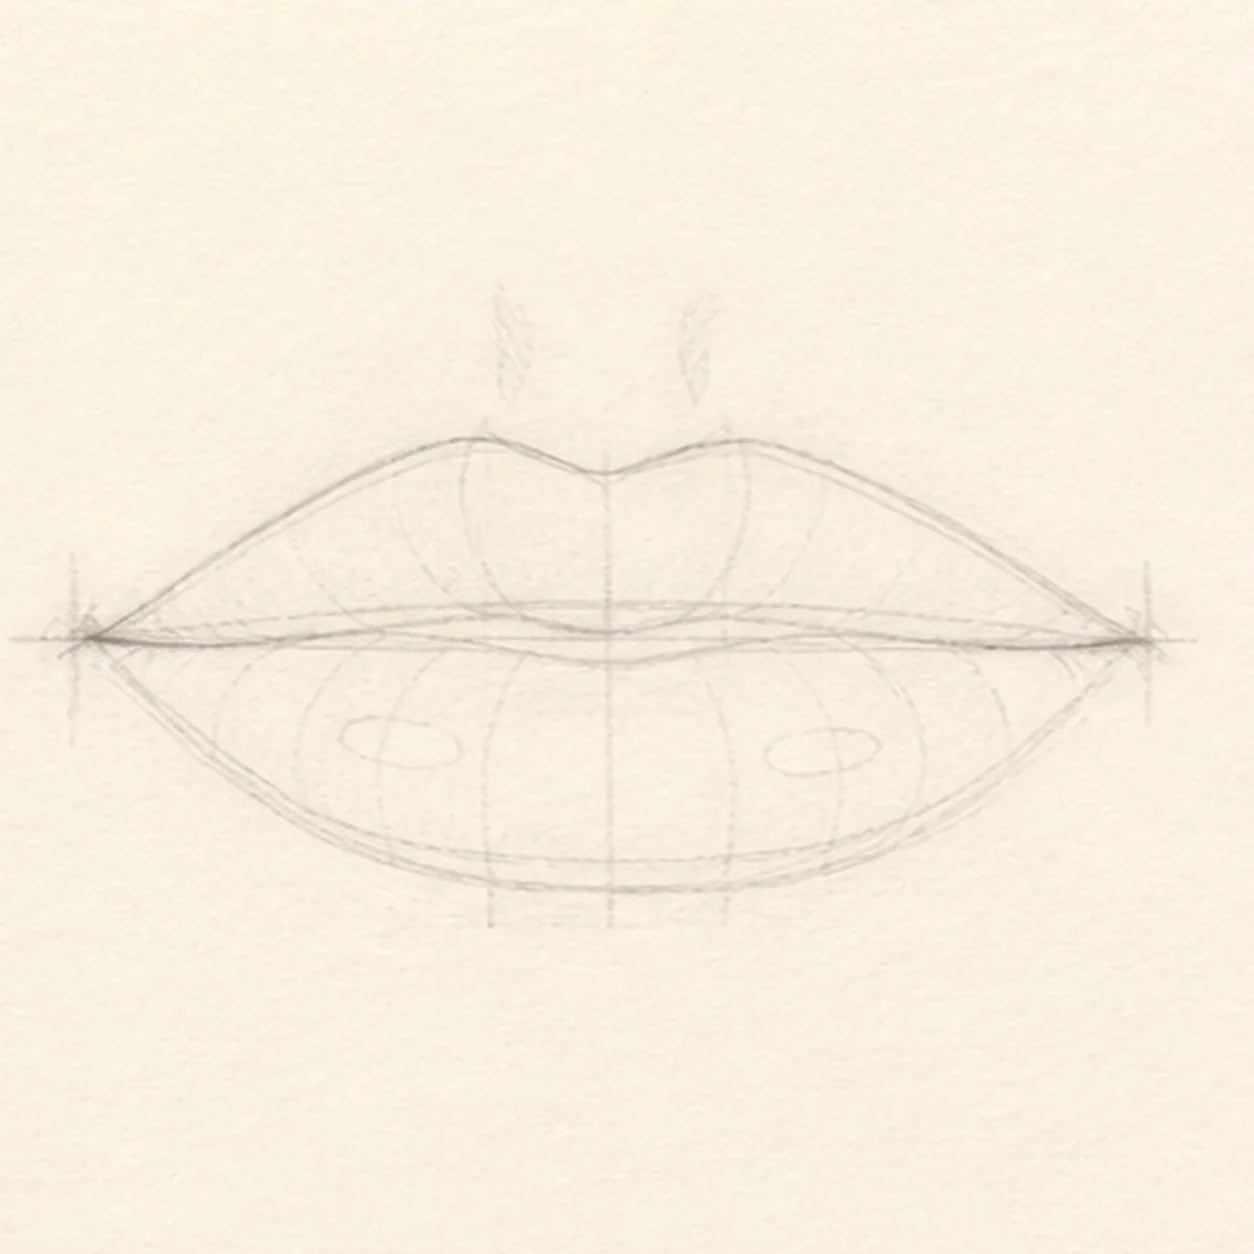
Wrap the lip silhouette
Add a loose upper- and lower-lip contour plus one continuous mouth seam while preserving the corners, opening, highlight, crease, and philtrum routes.
Sketch tip: Simplify each lip into two or three long arcs rather than tracing many tiny bumps. Rotate the page for the lower curve and keep your pressure light enough that the first contour still feels adjustable.
-
03
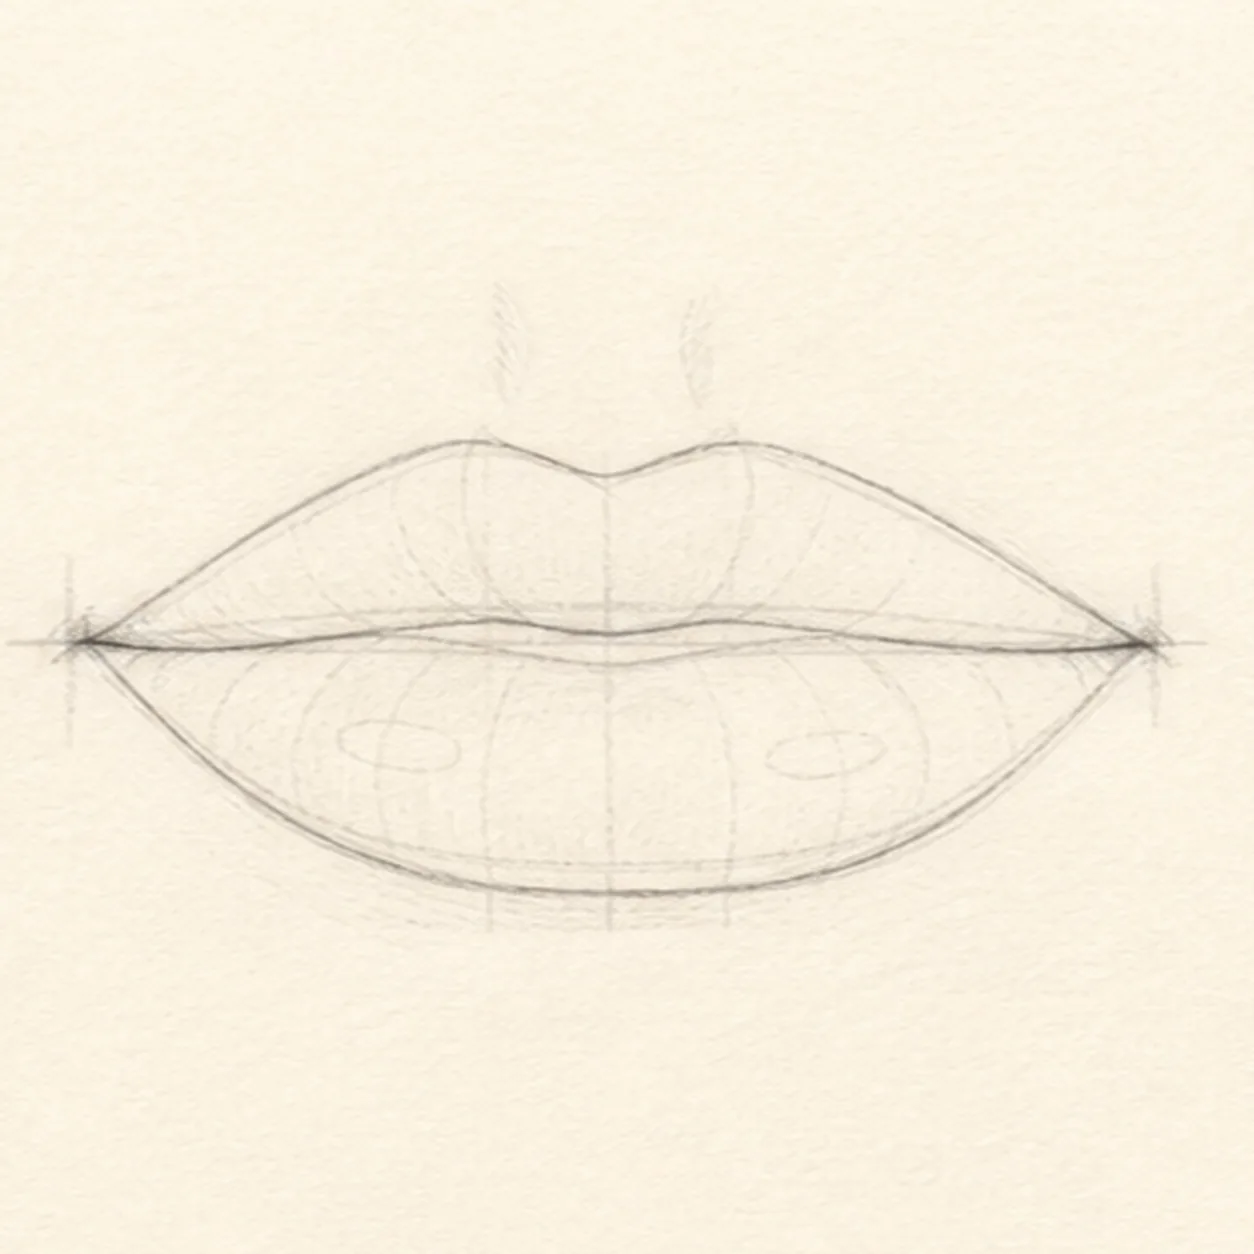
Shape the cupid's bow
Clarify the soft cupid's bow, both mouth corners, and the rounded lower-lip edge without adding shading or color.
Sketch tip: Compare the two peaks against the center dip instead of forcing perfect symmetry. Use the corners as fixed endpoints, then pull each upper-lip arc inward in one relaxed pass.
-
04
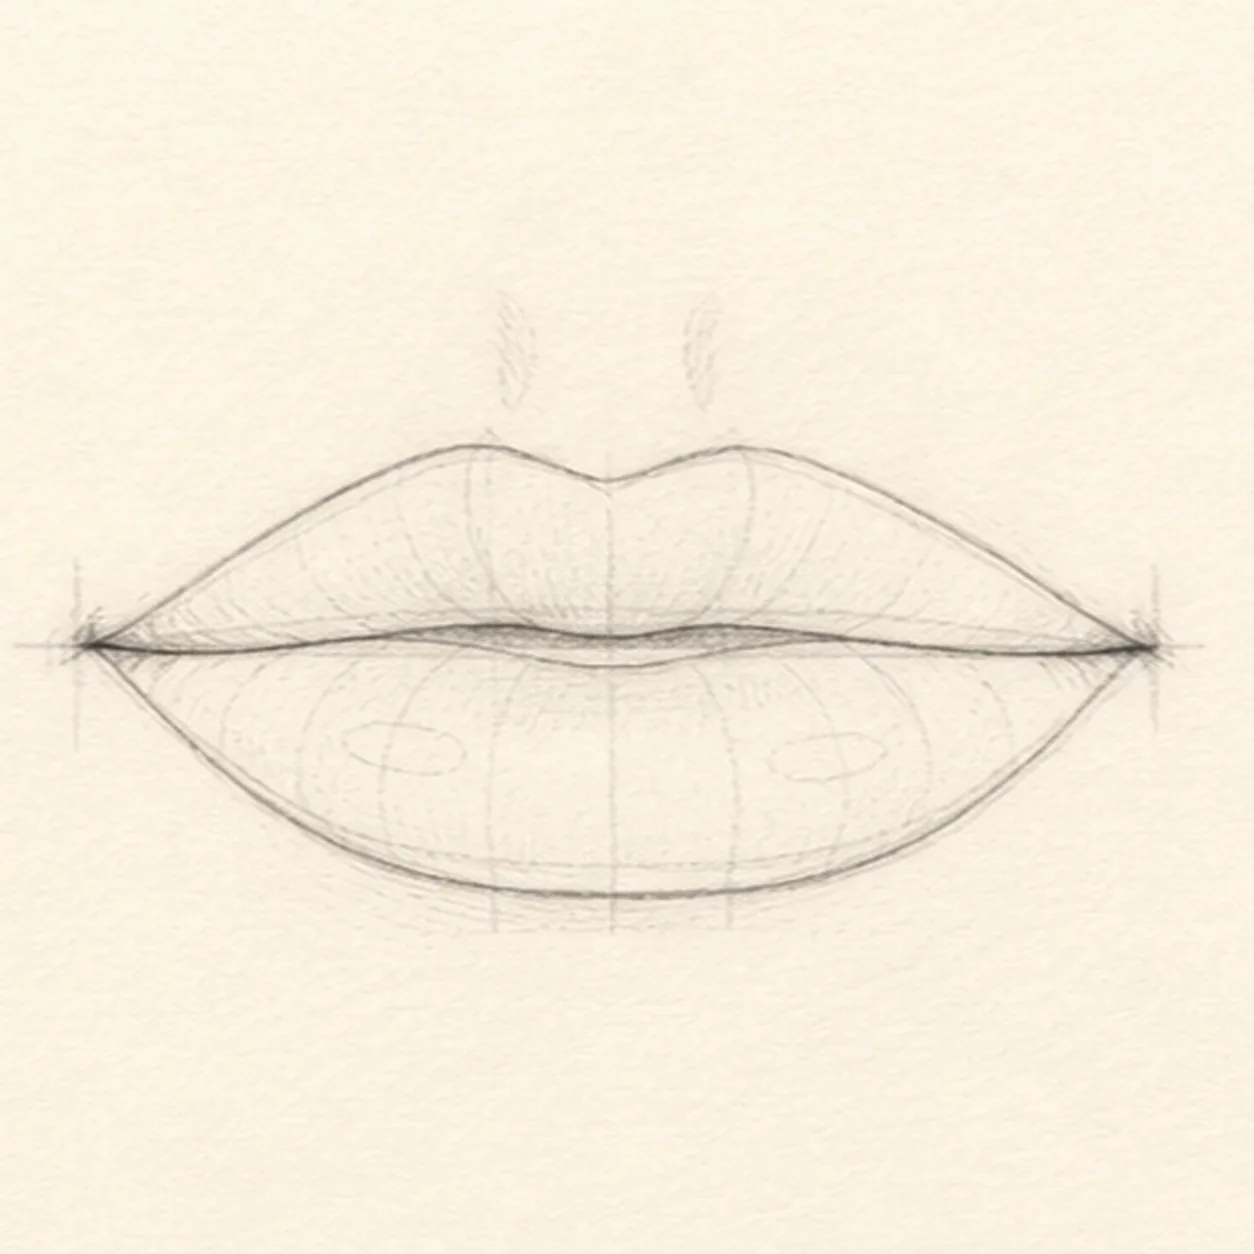
Open the mouth seam
Add one narrow inner opening and simple upper- and lower-lip plane breaks inside the established silhouette while keeping both corners and the mouth width fixed.
Sketch tip: Squint at the negative opening before darkening it: it should stay thinner than the lower lip. Work from each corner toward the center and leave teeth and tongue out so the lesson stays about lip form.
-
05
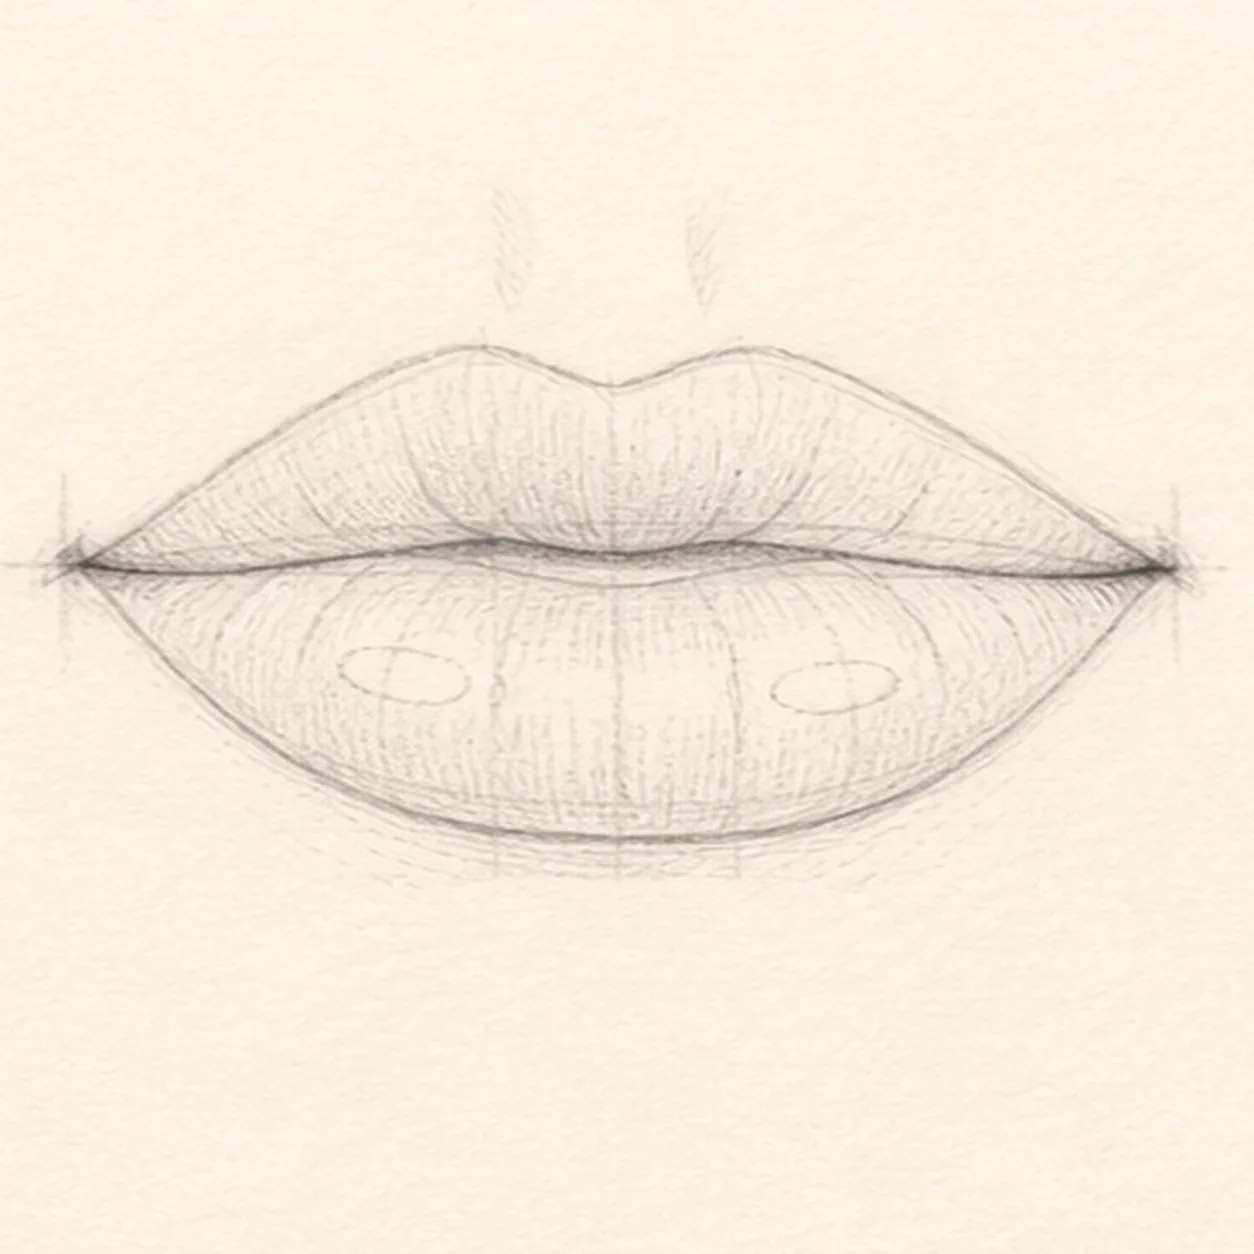
Place creases and highlights
Add restrained crease groups that follow both lip planes, keep two oval highlights and one broken center paper glow open, and reinforce the two light philtrum accents without changing the silhouette or opening.
Sketch tip: Pull the crease marks away from the mouth seam and taper your pressure before each line reaches the lip edge. Group the marks with quiet paper between them so the surface reads as soft rather than scratched.
-
06
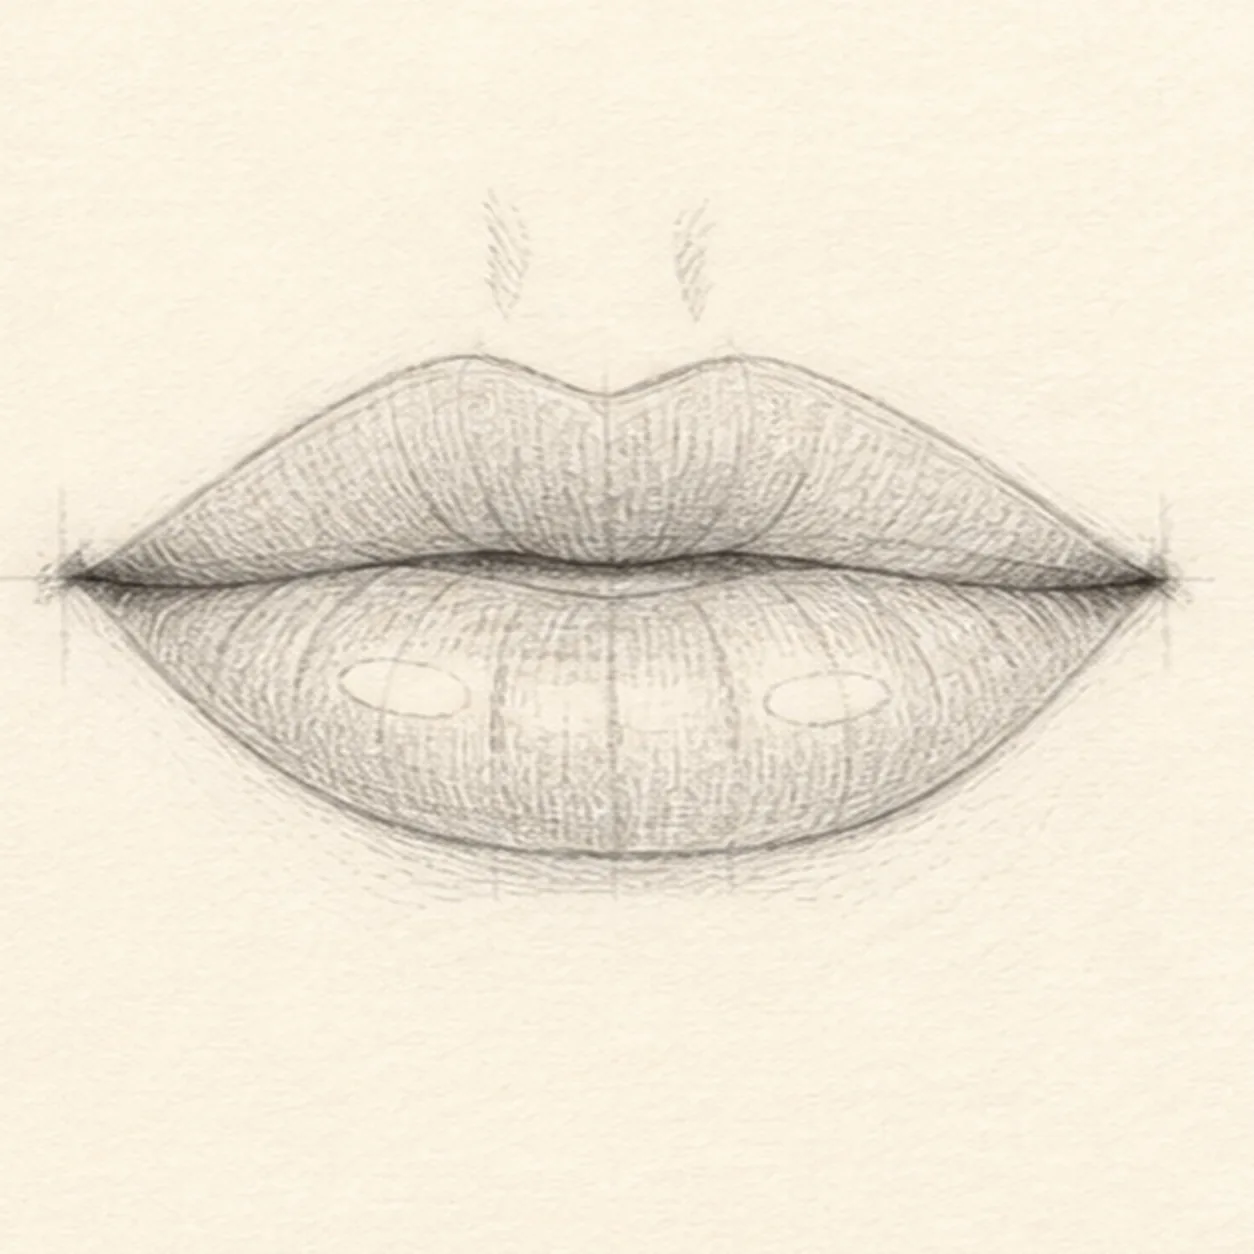
Build the graphite volume
Layer directional graphite hatching over the established lip planes, deepen the same opening and corners, and preserve every crease route, both oval highlights, and the broken center glow.
Sketch tip: Use the side of the 2B pencil for broad value and the point only near the seam and corners. Follow the lip curve with each stroke, then stop while the center of the lower lip remains visibly lighter.
-
07
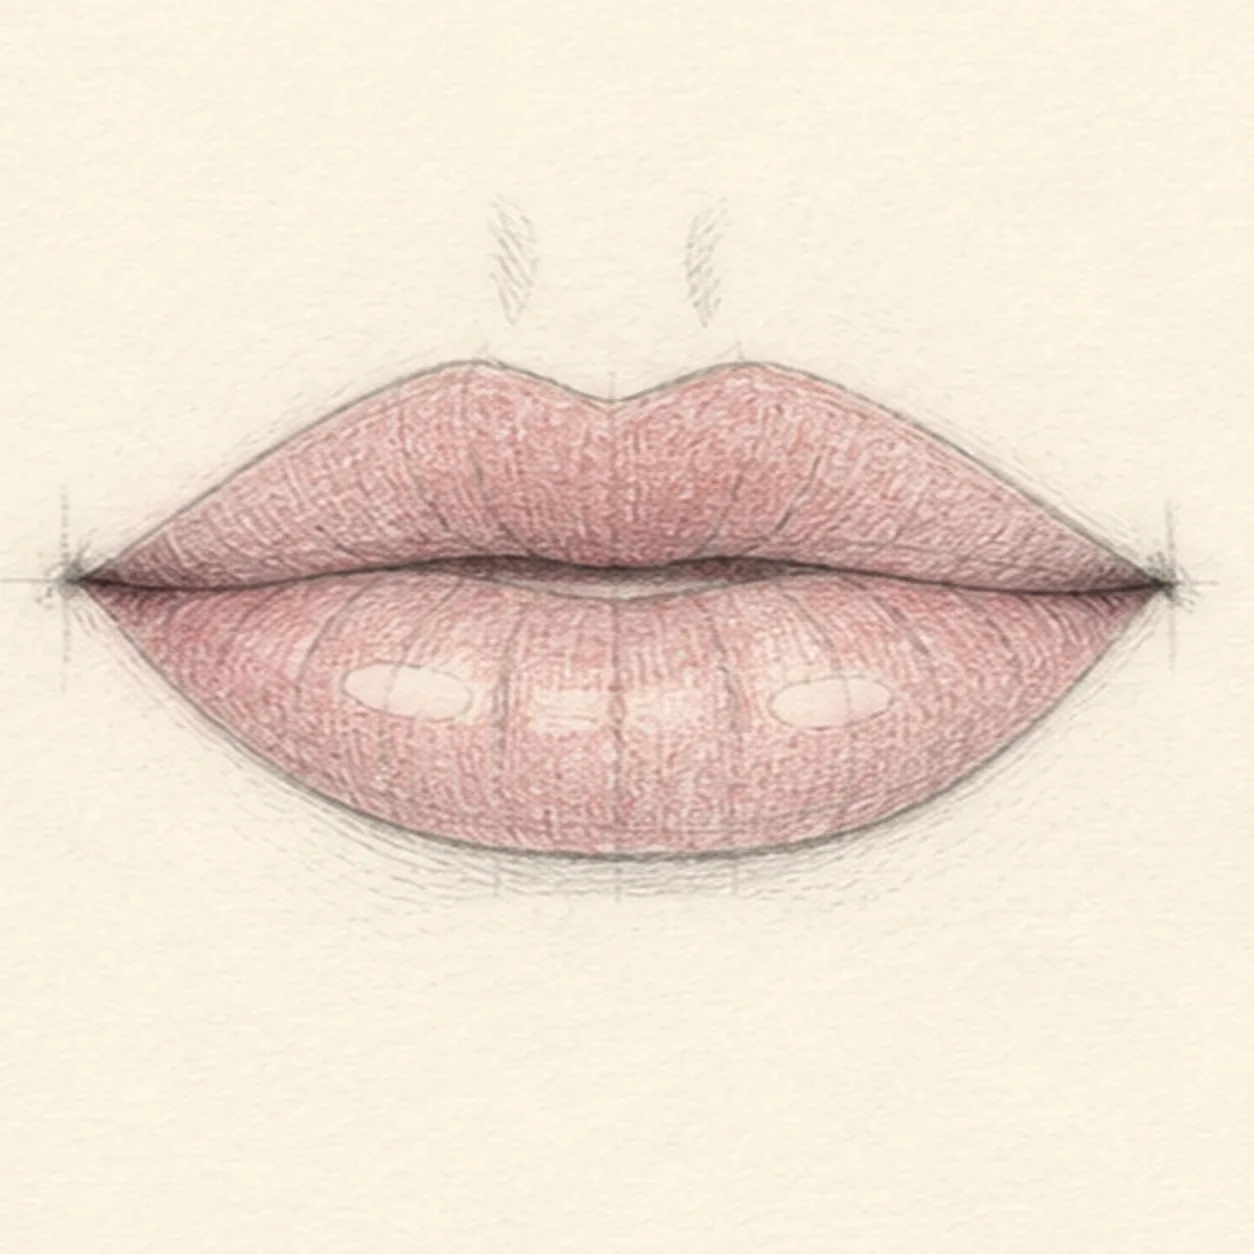
Layer the soft lip color
Glaze dusty rose over the established lips and muted plum into the existing opening and corners while preserving graphite grain, the crease routes, two oval highlights, and broken center glow.
Sketch tip: Build two light colored-pencil passes that wrap with the lip planes instead of one waxy coat. Let the graphite stay darkest at the seam and keep the open paper doing most of the highlight work.
-
08
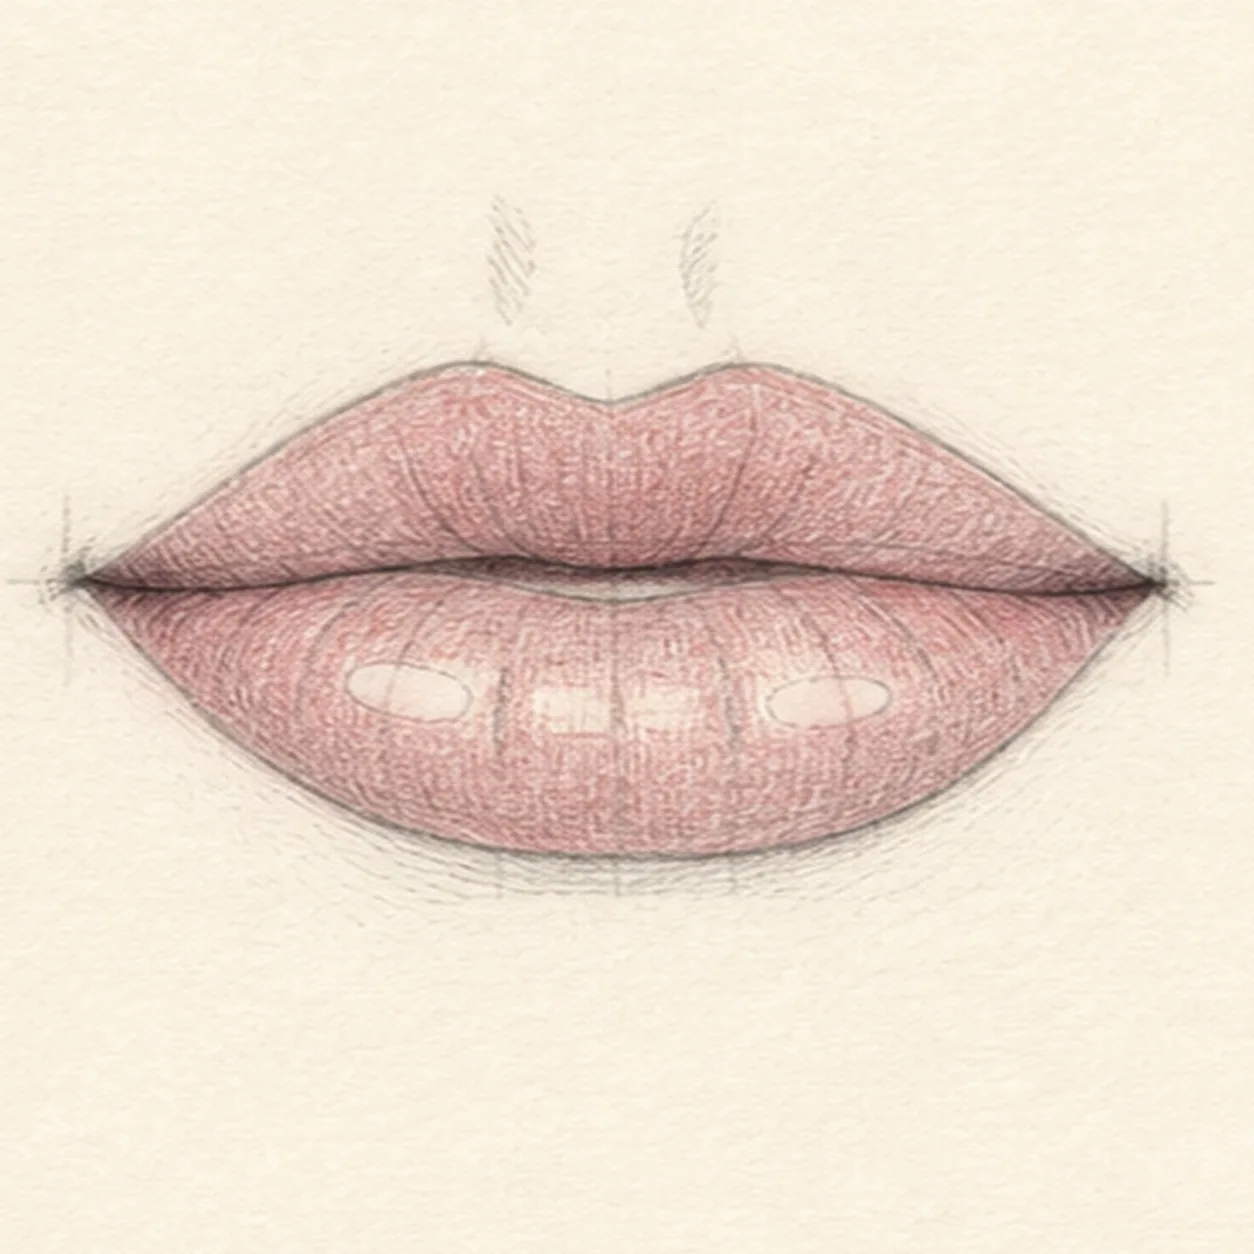
Settle the pouty finish
Strengthen selected established contours, deepen the same graphite and colored-pencil values, clarify the two oval highlights and broken center glow, and soften only pale guides that distract.
Sketch tip: Trace one continuous mouth seam, check that the narrow opening and both corners still align, then stop before the color becomes glossy or the paper tooth disappears. Change the lip width or color in your own study once the same axis-and-plane method feels clear.